Digital receipts
Use digital receipts to email a transaction receipt to a machine user instead of printing the receipt. For each generated transaction receipt, the machine sends a receipt message to Connect. The receipt message includes the receipt image and refers to the transaction. Digital receipts work for all receipt types, including receipt copy and reprint functions.
Prerequisites:
The Digital receipt feature must be enabled on the tenant.
The same permissions are required on the Connect on-Device side as for printed receipts.
View receipt image
Requires one of these roles in Connect:
r:global_admin
r:receipt_viewer
Download receipt PDF file
Requires one of these roles in Connect:
r:global_admin
r:receipt_viewer
Configure or update a machine user's email address (form, XML import)
Requires these roles for MUM endpoints in Connect:
connect/mum/machineusers/create / update
Requires these roles for REST endpoints:
connect/rest/machineusers/create / update
View a machine user's email address
Requires this role in Connect:
r:global_admin
This is what the flow looks like:
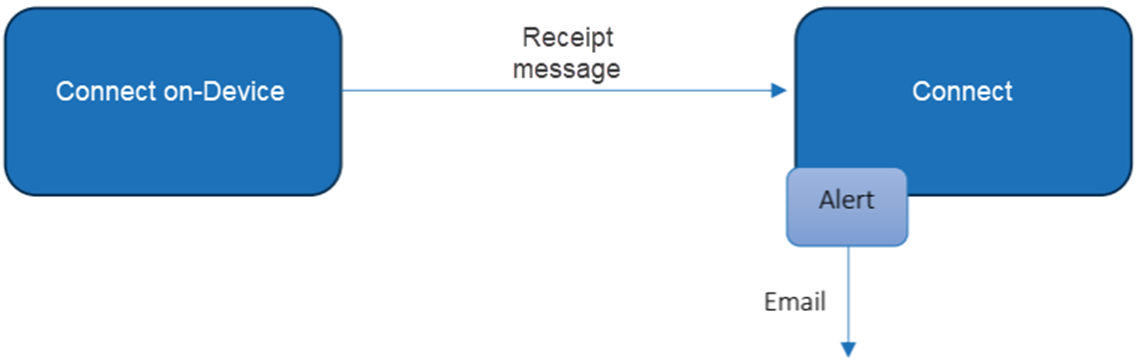
A machine user makes one or more transactions.
The transaction receipt is shown on screen to the machine user, provided the machine user has the necessary permissions.
The machine sends a receipt message to Connect.
Connect receives the message, including the receipt image.
Connect turns the receipt image into a PDF and emails it to the resolved address, provided the tenant has Digital receipt enabled and a Receipts alert covers the machine.
If no valid email address is found, no email is sent.
Configuring digital receipts
To send digital receipts, you need to set up an email address on the tenant, the machine user, or the machine. You must also configure a receipt alert that triggers the send operation when a transaction has been completed.
When the receipt is triggered, Connect checks if a valid email address is configured on the machine where the transaction was made. If no valid email address is found on the machine, Connect checks if a valid email address is configured on the machine user who made the transaction. If no valid email address is found on the machine user, Connect uses the default email address configured on the tenant. If no valid email address is available, no receipt is sent.
You can upload machine users, including their email addresses, via a users.xml file. For more information, see Machine-user management (MUM).
Note
Email addresses configured on machine users are not synchronized with machines.
Sign in to Connect.
Expand ADMINISTRATION.
Set up the email that receives the digital receipts.
To configure the email on the tenant (default), select Tenants, go to the tenant where you want to add the email address, select Edit, enter the email address in the Default email address box, and then select Update. Editing a tenant requires global admin permissions.
To configure the email on the machine user, select Machine users, go to the machine user where you want to add the email address, select Edit, enter the email address in the Email address box, and then select Update machine user. Viewing a machine user's email address requires global admin user permissions. A basic machine user can change the email address but cannot view the current email address.
To configure an email address on the machine, you must configure a Custom Data field in the message sent from the machine to Connect. You do this in the
custom_data_entry.xmlfile in the Connect on-Device file system. For more information, see the instructions below.
Expand ALERTS.
Select Alerts.
Select Create alert.
On the Details tab, in the Alert name box, enter a name for the alert.
On the Details tab, in the Triggering event box, select Receipts.
Select Next.
On the Scope tab, select the sites, machine group, or machine where the transactions are made.
Select Next.
On the Time tab, you can choose whether the alert should trigger a digital receipt only during a specific time period.
Select Next.
On the Recipients tab, in the Alert type box, select Digital receipt.
Select Create alert.
Read this information Custom data entry
Locate the
custom_data_entry.xmlfile in the Connect on-Device installation folder.Edit the file and save it.
Note
You must define the RECEIPT_EMAIL key for the Custom Data field.
Connect looks for the RECEIPT_EMAIL key in the message. Other keys are ignored.
The email address data must be set in plain text.
Viewing digital receipts
The Alerts history view in Connect shows all digital receipts.
You can filter the view by these criteria:
Site
Machine
Reporting period