Receipt Builder user interface overview
Use the different elements of the Receipt Builder user interface when you want to create a new receipt or edit an existing receipt.
UI item | Description |
|---|---|
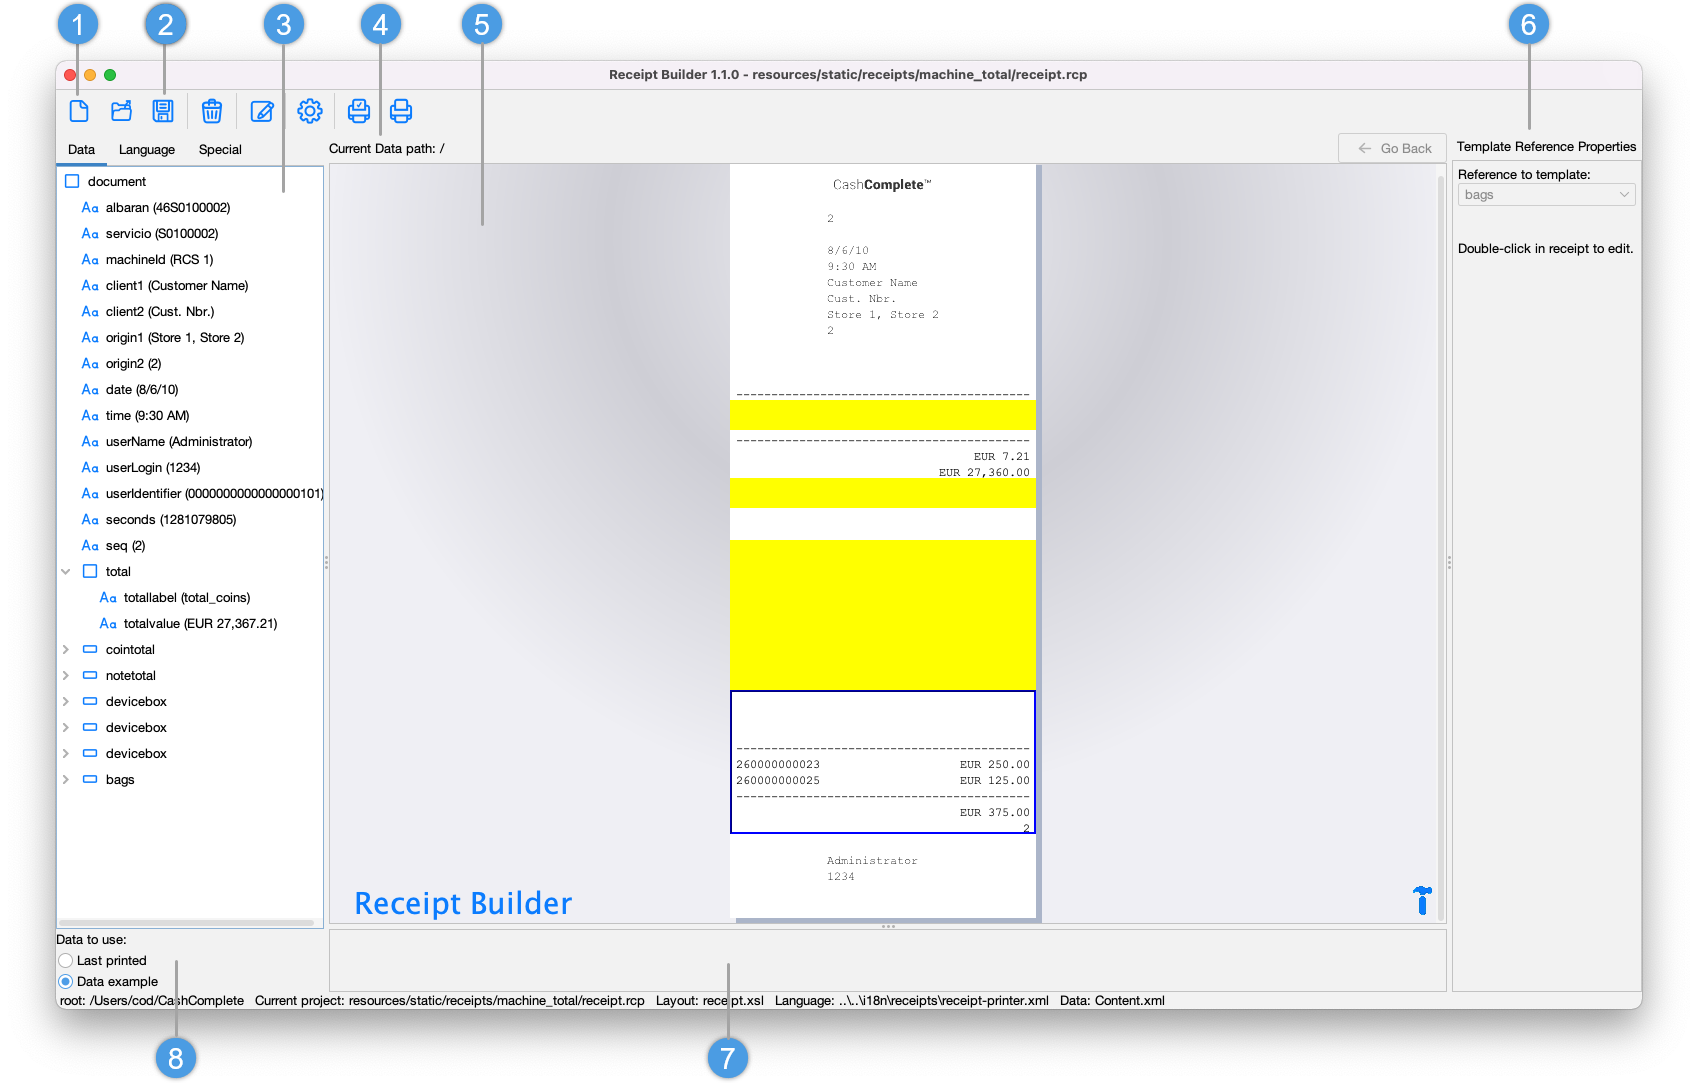
1 | Menu bar with the following menus and commands:
|
2 | Toolbar with the following buttons:
|
3 | Navigation pane Contains elements you can use to build the receipt. The navigation pane has the following tabs:
|
4 | Current data path Shows the path to the data for a template open in the work area. You can return to previous templates using the Back button Select the Back button to go back to the previous template. Select the template for the data element to open up the table together with the header. 'Path' now shows the path and the Back button. Select a data row in the table to navigate into the template. 'Path' shows the path to the layout where the layout is stored. Here you can edit the rows in the table. Select Back to return to the template. |
5 | Work area Shows the selected receipt. In the work area, you click inside a receipt to select a row or a template in the receipt. You can drag rows and templates to a new position to rearrange the receipt layout. You can drop one row inside another to merge them as columns on the same row. The maximum number of columns is four. You can copy, cut, paste, and delete functions on the currently selected part. You can double-click a template to edit it. |
6 | Properties pane Shows properties for the part of the receipt currently selected in the work area, provided that the part has properties. If you have selected a row of text columns, you can rearrange the columns by dragging them to a new position. Click anywhere on the gray area inside the properties for a column and then drop it on a dark gray area with the text 'Drop columns here'. You can drop items directly from the navigation pane into the Properties pane. |
7 | Help pane Shows tips and tricks for the selected part of the receipt or for the pane the pointer is currently hovering over. The Help pane tells you what you can do, or why there is an error on a selected part. |
8 | Data to use Select whether to use the data example or the last print as data when you edit a receipt. The selection you make decides how the Data tab is populated in the navigation pane and how the receipt is rendered in the work area. |


