Setting up receipt — quick start
Note
Receipt Builder is included in the installation. See [installation folder]\tools\ReceiptJ.
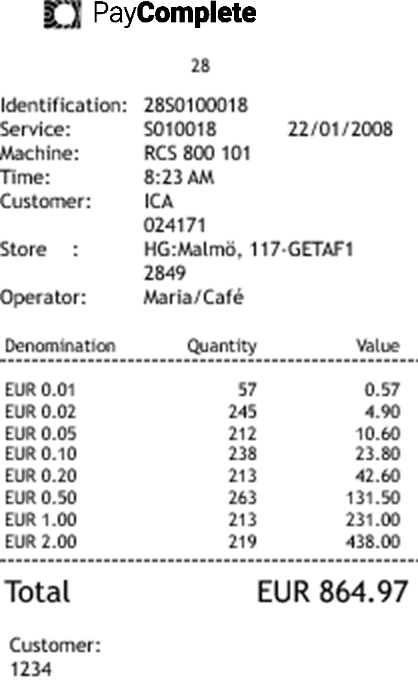
The receipt above has the following information:
Text on receipt | Description |
|---|---|
Regional number | The area code (28, two positions). |
Identification | The Identification consists of several parts:. The area code (28, two positions) followed by the function (S, one position) followed by the machine-unique ID (01, two positions: 0-9 and a-z). |
Service | Repeats function and machine-unique ID. |
Machine | The Machine ID fetched from the |
Time | Shows the time the receipt was printed. |
Customer | The name of the customer (ICA, maximum 20 positions) followed by the customer number (024171, maximum 10 positions). |
Store | The store name (HG:Malmö, maximum 12 positions) followed by the store name (117-GETAF1, maximum 12 positions) followed by the store number (2849, maximum 10 positions) |
Operator | The operator designation (Maria/Café) |
The information on a receipt, such as area code, machine ID, machine serial number, and so on, is defined in a properties file named machine.properties. You can edit this file using a text editor.
regional.number=28
rcs.function=S
machine.unique.id=01
machine.name=RCS 800
machine.serial.number=101
customer.name=ICA
customer.number=024171
store.name1=HG:MALMÖ
store.name2=117-GETAF1
store.number=2849
In the (
[installation folder]\resources\configurable\configurationfolder, open themachine.propertiesfile.Edit the
machine.propertiesfile. The editable strings are:1
regional.number
Area code, 2 position
2
rcs.function
Machine function, 1 position
3
machine.unique.id
Unique machine ID, 2 positions 0-9 and a-z
4
machine.name
Machine name, 14 positions
5
machine.serial.number
Machine serial number, 6 positions
6
customer.name
Customer name, 20 positions
7
customer.number
Customer number, 10 positions
8
store.name1
Store name, 12 positions
9
store.name2
Store name, 12 positions
10
store.number
Store number, 10 positions
Press Ctrl + s.
Select File > Save to save the changes.
Select File > Exit to close the file.
Start Connect on-Device.
Adding a logo to a receipt
You can add custom logos to receipts.
The logo must meet the following requirements:
Maximum width: 550 pixels. The recommended size is approximately 200x20 pixels (width x height).
1 bit
Black and white
PNG format
Prepare your logo so that it meets the requirements listed above.
Name the file
receipt_logo.png.Locate the printer folder in the resources folder in the CashComplete directory and replace the
receipt_logo.pngfile with your file. The path to the file is:CashComplete\resources\configurable\images\receipts\receipt_logo.png.