ICX-9 installation and configuration
Prerequisites:
Connect on-Device version 3.43.0 or later.
ICX-9 Firmware HMI version 1.39.1666 or later.
Connect on-Device network access to the ICX-9 shared folder.
The Connect on-Device integration of the ICX-9 counting machine is based on file sharing. The ICX-9 creates XML files with data from the counting process and publishes them to a shared export folder. Connect on-Device runs on a separate computer with access to the ICX-9 shared folder. Connect on-Device monitors the shared folder. For every XML file, Connect on-Device translates the data into RM messages and sends the messages to Connect as a COUNTING transaction. The handled files are then moved from the public folder and stored in the Connect on-Device Counting Adapter archive folder.
Important
The Counting Adapter in Connect on-Device ignores 0-transactions (transactions with total = 0). The XML files are read and removed from the ICX-9 export folder, but are not sent to Connect.
Installing and configuring ICX-9
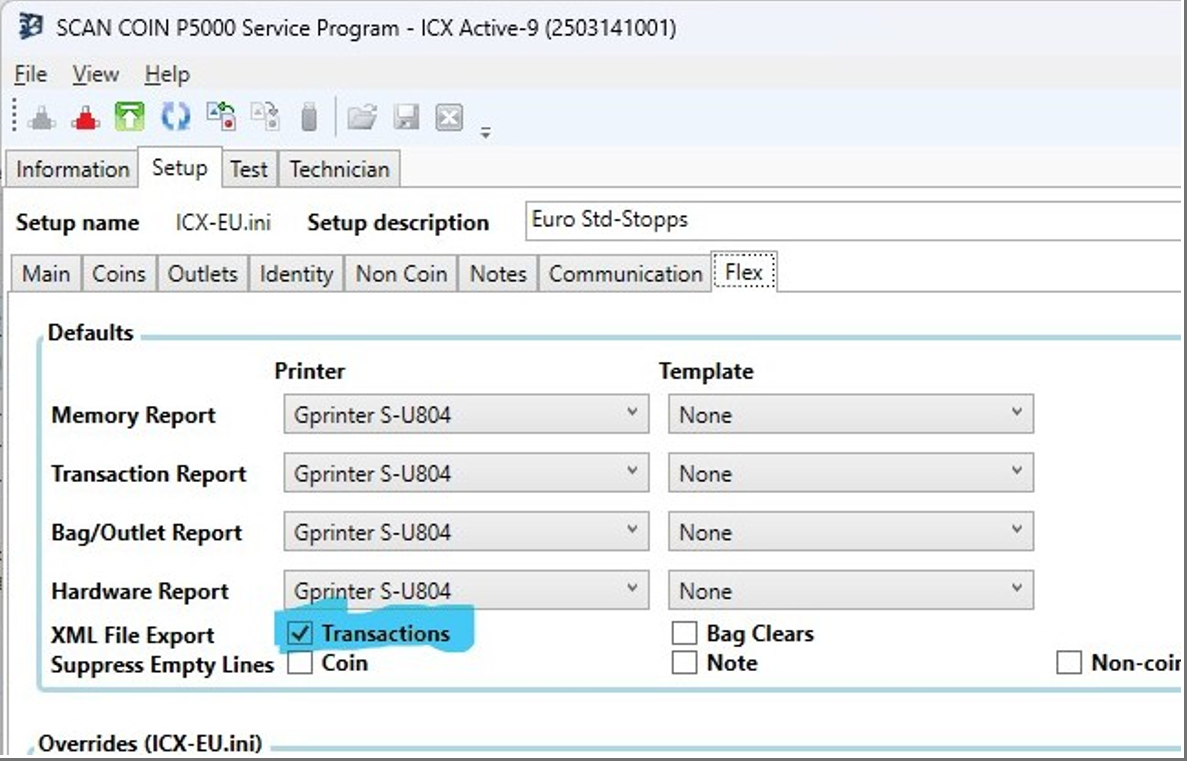
Use the P5000 Configuration tool to configure the ICX-9 interface.
To activate XML support, select the Setup tab and then select Transactions.
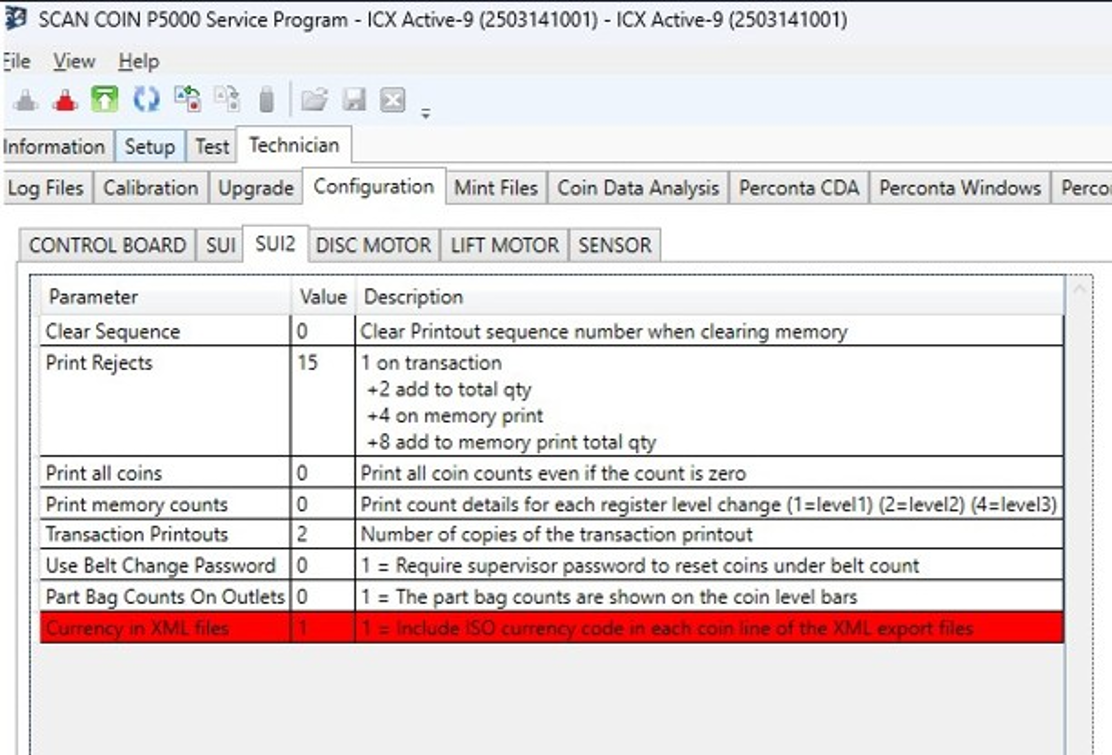
To activate the currency attribute in the XML file:
Select the Technician tab.
Select the Configuration tab.
Select the SUI2 tab.
In the Value column, set the Currency in XML files to 1.
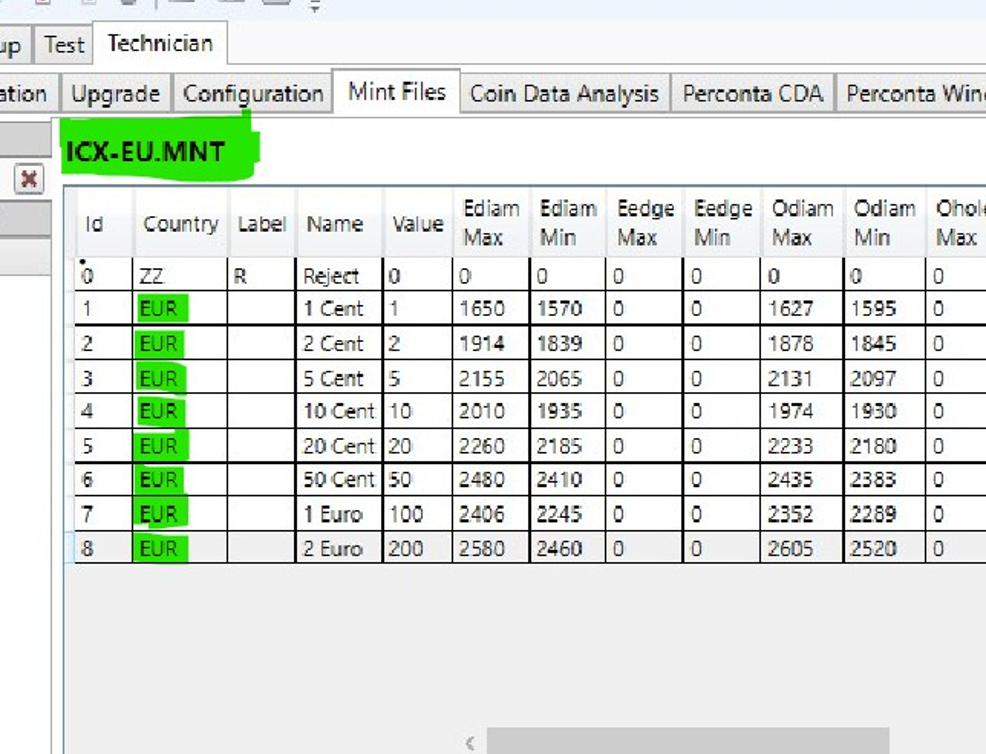
The Mint File includes the Country attribute used for the currency code in the export XML file. The country code is different from the ISO currency code. This means you need to replace the country code with the ISO currency code for different configured currencies.
To modify the coin file
Select the Technician tab.
Select the Mint Files tab.
Edit the ISO code in the Country column.
In this example, EU has been changed to EUR:
Configure the folder permissions on Linux.
Background:
The default ICX-9 XML export folder is configured to
/home/pi/Documents/ICXActive9/Export. The export folder is populated as a Shared folder by the OS Linux on the ICX-9 machine. To make sure the shared folder is accessible from the Connect on-Device machine, you must configure the access level on Linux.There are two options when configuring folder permissions on Linux:
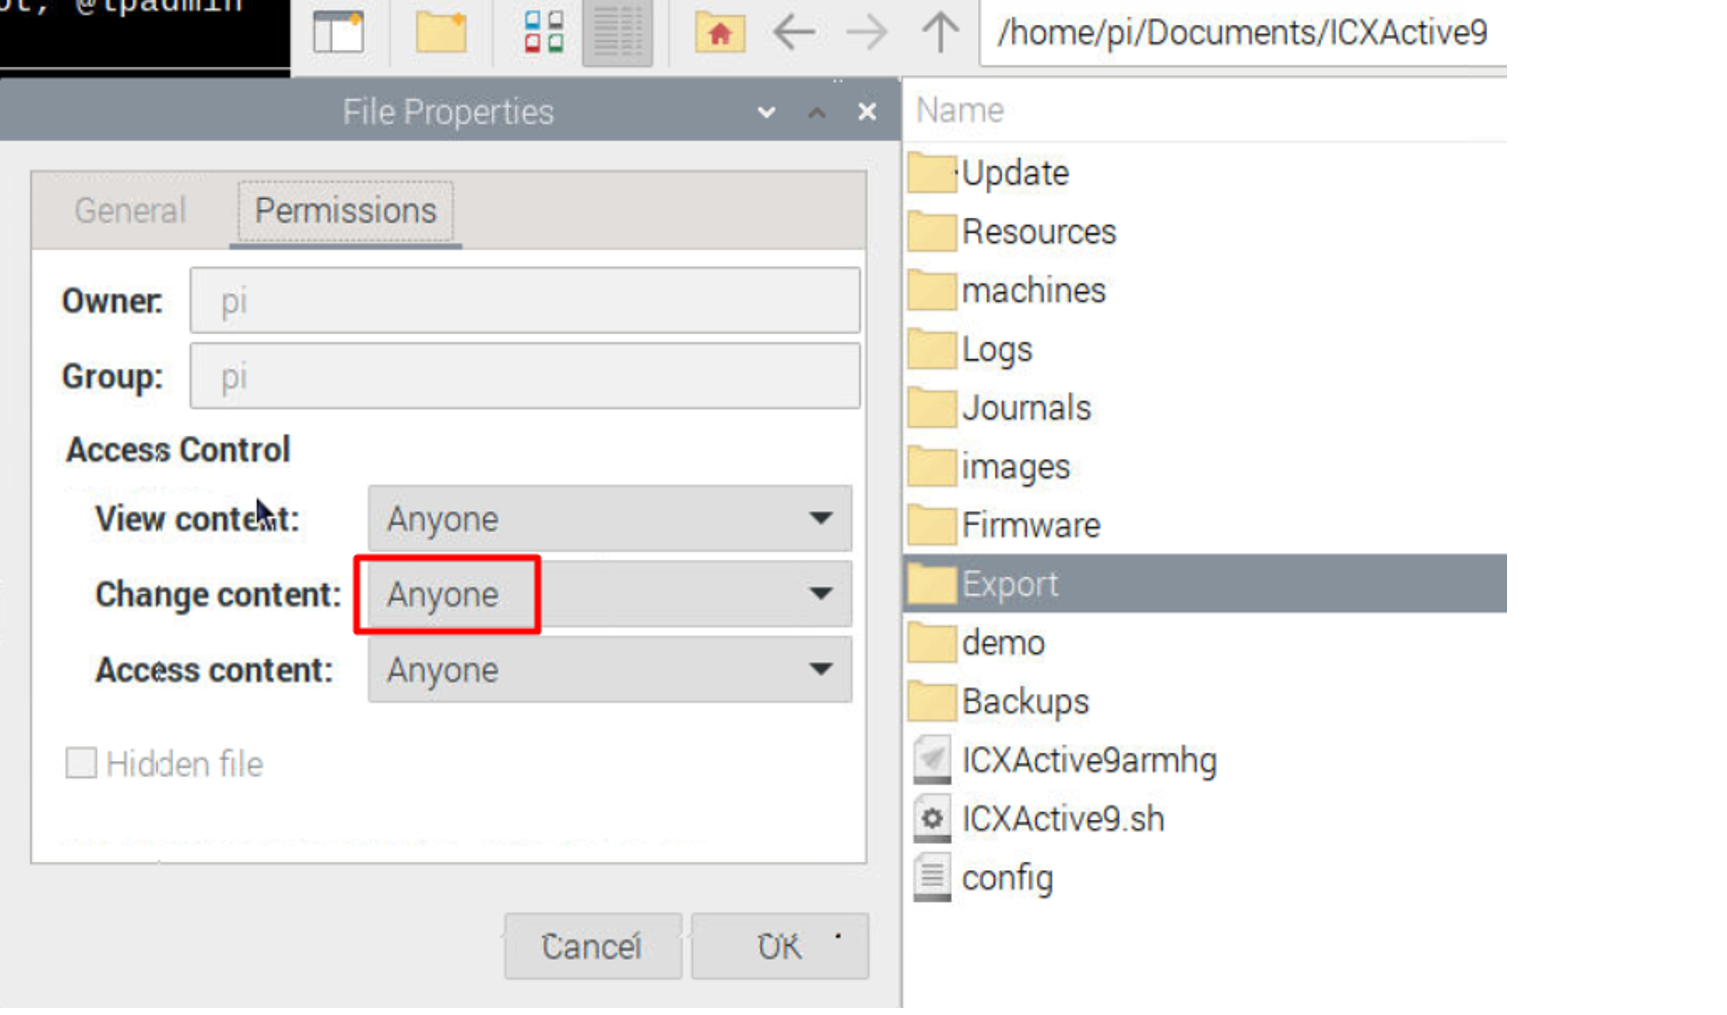
Configure permissions using the Linux File Explorer
Right-click the Export folder and select Properties.
Select the Permissions tab.
In the Change content box, select Anyone.
Configure permissions using the Linux command line
Open the Linux command line.
Paste:
sudo chmod -R 777/home/pi/Documents/ICXActive9/Export
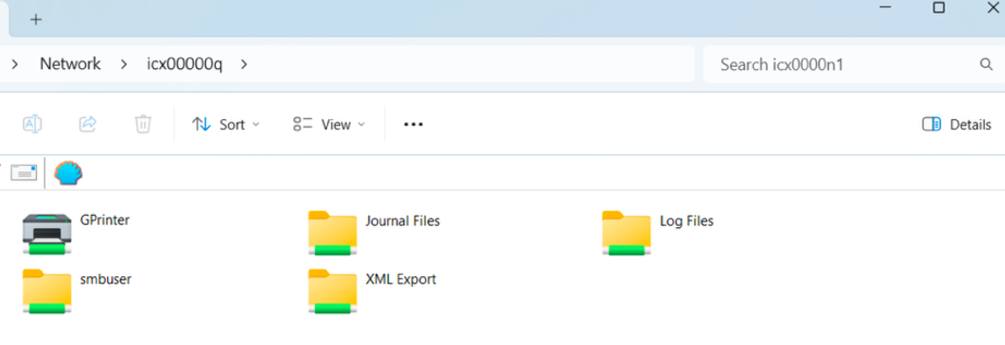
Access the shared folder from the Connect on-Device machine by using the IP address or the host machine.
IP address: \\<IPAddress>\XML Export
Hostname: \\icx00000q\XML Export
If you are asked to provide credentials, use the Linux smbuser and password.
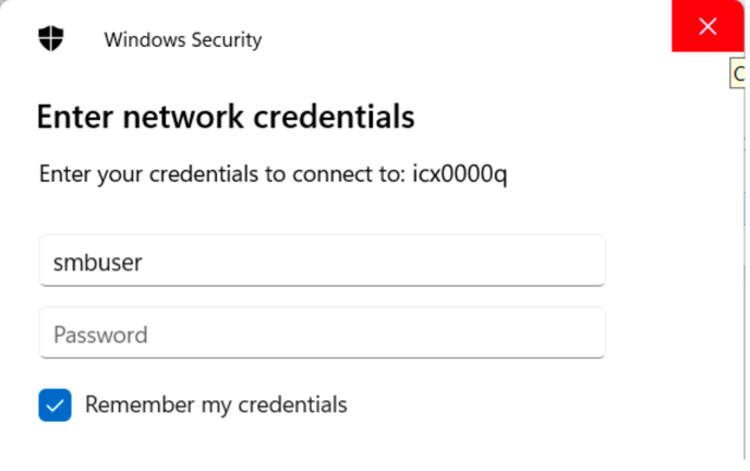
If you don't know the password, it can be changed.
Changing the HostName or SMBUSER password
To change the HostName or SMBUSER password, use the Raspberry Pi Configuration on the ICX-9 machine.
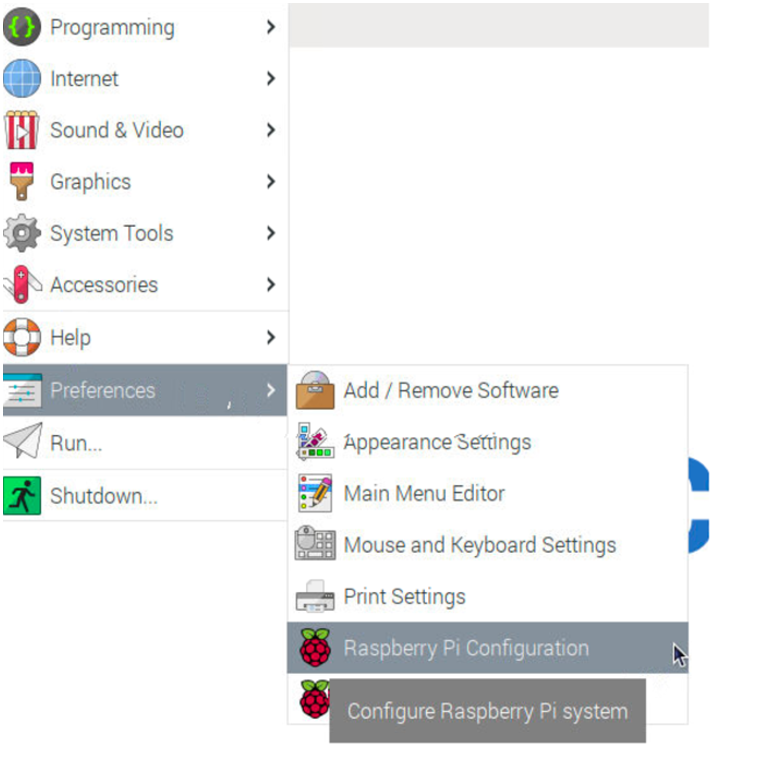
Select the System tab, then select Password to change the password.
Select the System tab, then select Hostname to change the Hostname.
Select OK when you are done.
Setting up Connect
Setting up Connect on-Device includes
A standard Connect on-Device installation on a separate computer with access to the folder shared with ICX-9.
Registering the Connect on-Device installation in Connect with the relevant UUID, machine name, and site.
You must set the machine type to others.
Standard MQTT configuration for Connect on-Device in Connect.
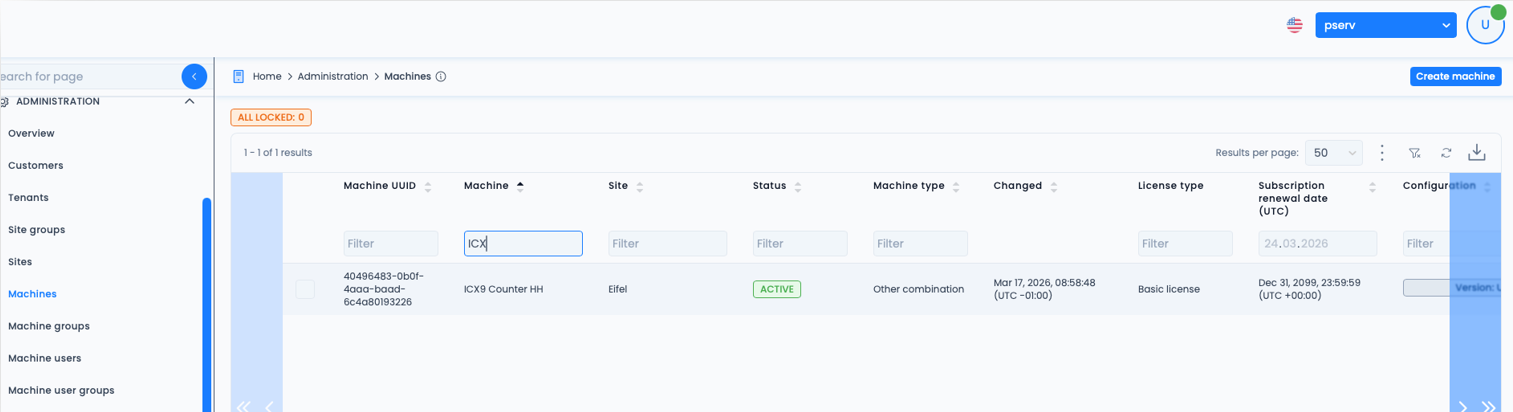
This is an example of an ICX-9 registered in Connect:
Activating and configuring the ICX-9 counting adapter
In Connect on-Device Studio, go to the Additional devices page.
Select Count adapter.
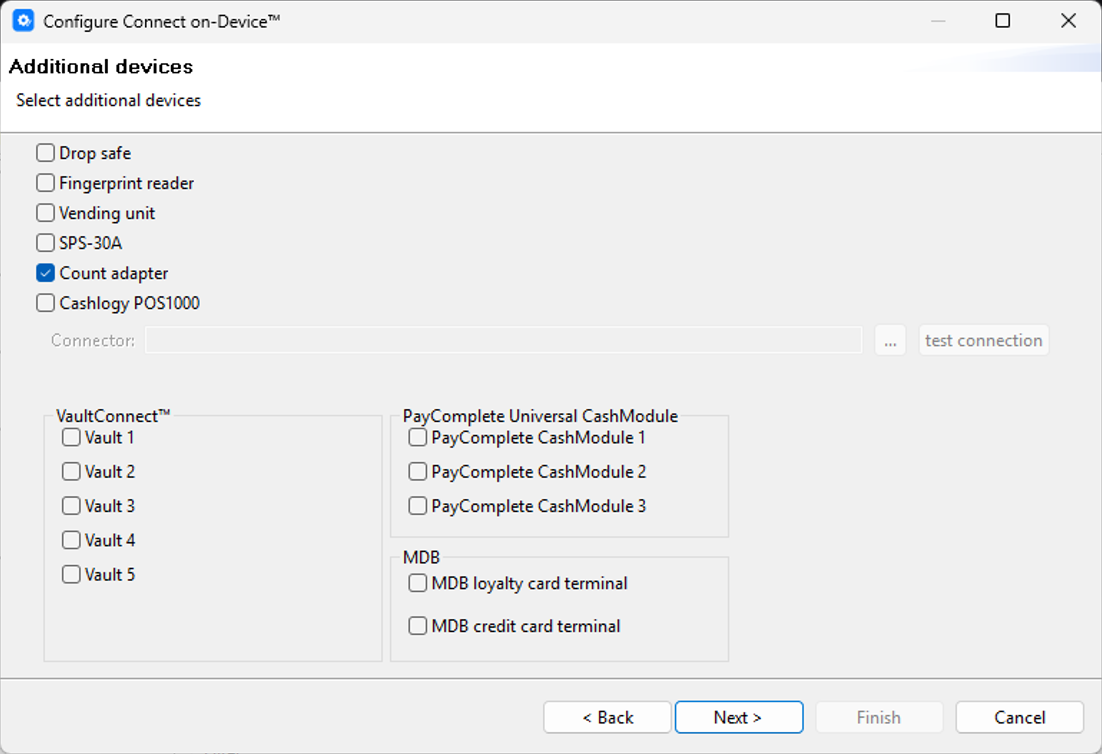
Select Next.
On the Count adapter page:
In the Directory field, type the path or the name of the ICX shared folder.
In the Interval box, select how frequently you want the shared folder to be monitored.
In the Adapter schema box, select the ICX-9.properties XML format.
By default, the directory is
\\<IPAddress>\XML Exportor hostname\\icx00000q\XML Export.Select Next and finally OK to get to the end of the wizard and save your settings.
Archiving
All successfully handled source XML files are stored in an archive folder. The archive folder is created and named according to the current date in this format: yyyy/MM/dd/myTransaction.xml
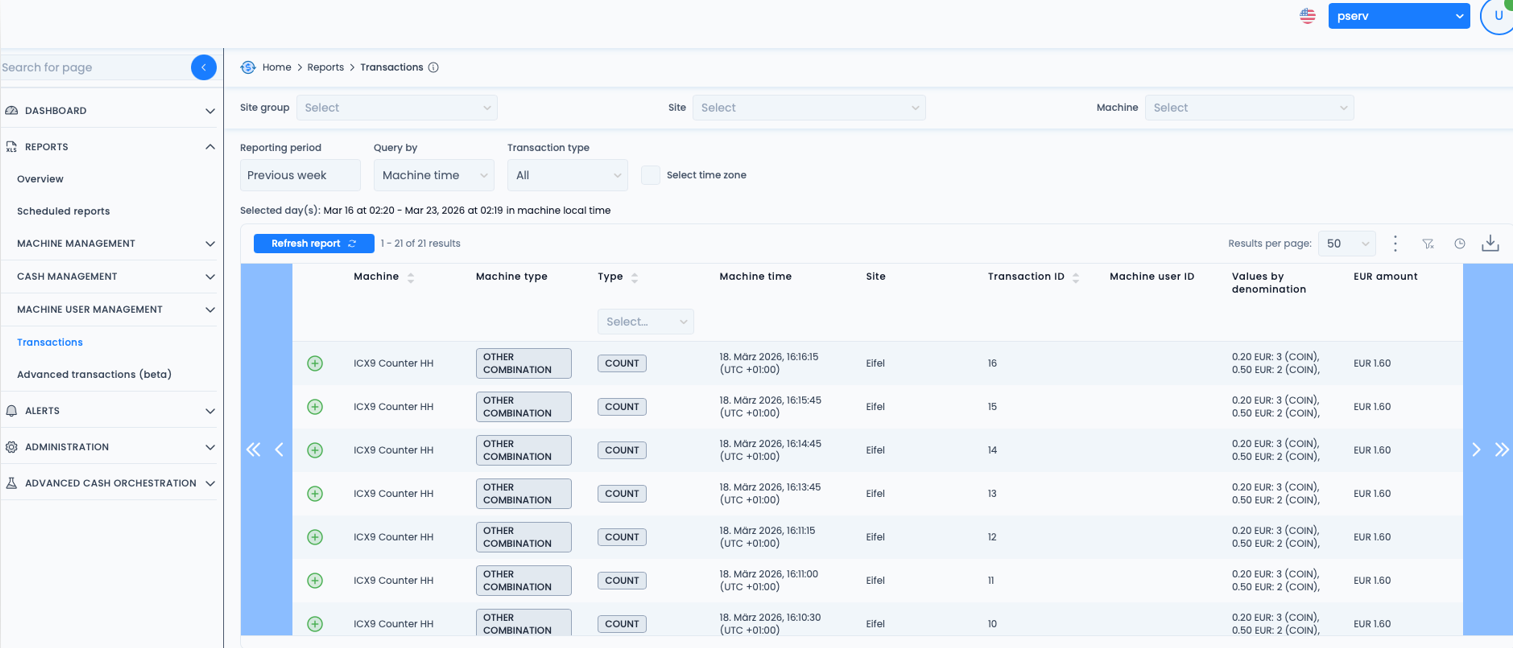
Transaction data in Connect
The Count transactions are shown in Connect: