CDS-9L/CDS-820j configuration
You can configure CDS-9L/CDS-820j in several optional ways:
Configuring CDS-9L/CDS-820j using Connect on-Device Studio
Configuring CDS-9L/CDS-820j using CDS820jSetup.exe
Configuring CDS-9L/CDS-820j using and SD card
See also
Connect on-Device system-specific configuration
Configuring CDS-9L/CDS-820j using Connect on-Device Studio
Configuring CDS-820j/CDS-9L using CDS820jSetup.exe
Configuring CDS-9L/CDS-820j using an SD card
Replacing the CDS-820j/CDS-9L micro SD card
Setting up CDS-820j/CDS-9L with ID last
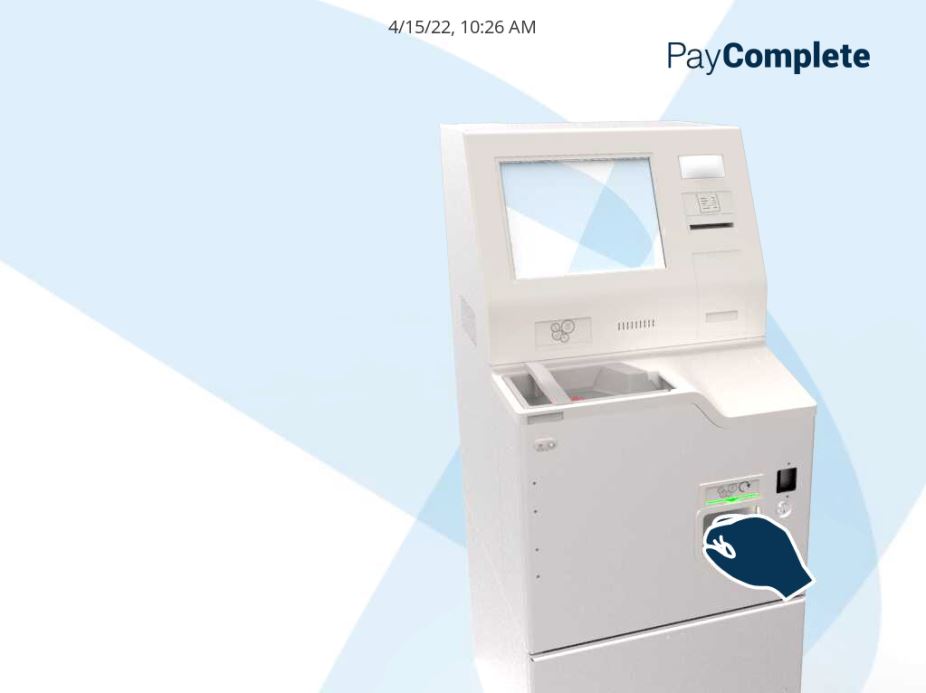
Starting CDS-9L/CDS-820j
You start CDS-9L/CDS-820j to perform an operation.
If the machine is in idle state, activate the machine.
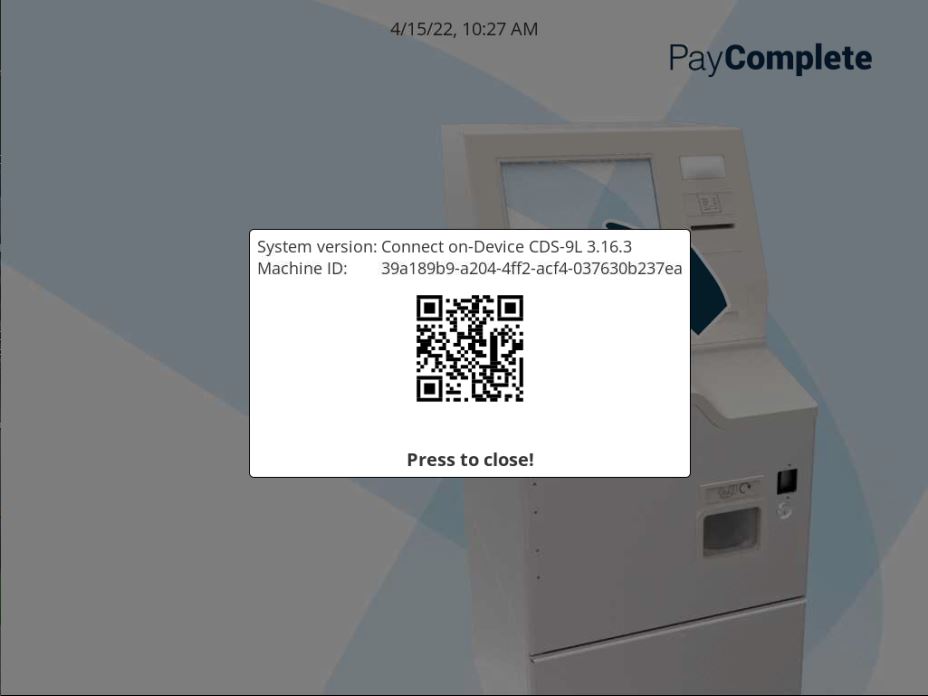
Press the PayComplete™ logo to show the system version and the machine ID. When you press the logo, a QR code indicating the machine ID is shown
Scan the QR code with a mobile device to show the machine ID. You need the machine ID when requesting a new Connect on-Device license and for other purposes.
Open the operator menu either from the screen or from an attached keyboard to start using the machine.

CDS-9L/CDS-820j Linux operations
You can connect a keyboard and a mouse to the computer's USB ports and do the configuration by using the listed commands.
Command/Shortcut | Description |
|---|---|
ALT + F4 | Terminates the active screen. When Connect on-Device is started, this command closes Connect on-Device and takes you to the Linux Desktop (which is empty). |
ALT + TAB | Switches between active screens |
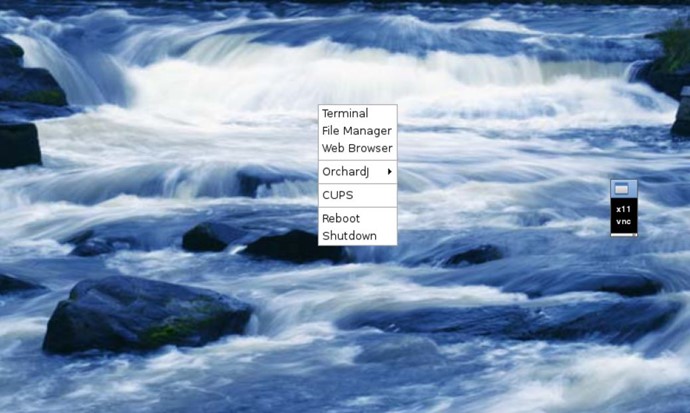
Right mouse click | Shows the operation menu on the Linux Desktop. |
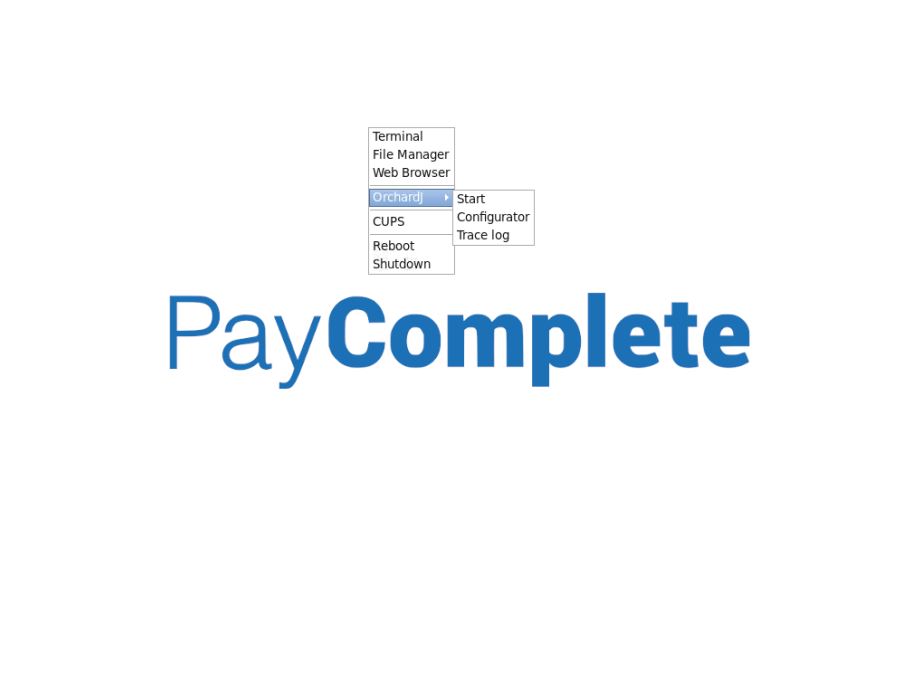
CDS-9L operator menu on Linux desktop
CDS-820j operator menu on Linux desktop
CDS-9L/CDS-820j — Operator menu
These are the commands available on the operator menu.
Command | Description |
|---|---|
Terminal | Select to open the Linux command prompt. In the command prompt, you use standard Linux commands. |
File manager | Select to open the Linux file explorer. |
Web browser | Select to open the Luakit web browser. |
OrchardJ | Expand to start Connect on-Device the configurator or to view trace logs. |
Cups | Select to start the Linux print server. |
Reboot | Select to reboot the machine. |
Shutdown | Select to shut down the Linux operation system. |
CDS-9L operator menu
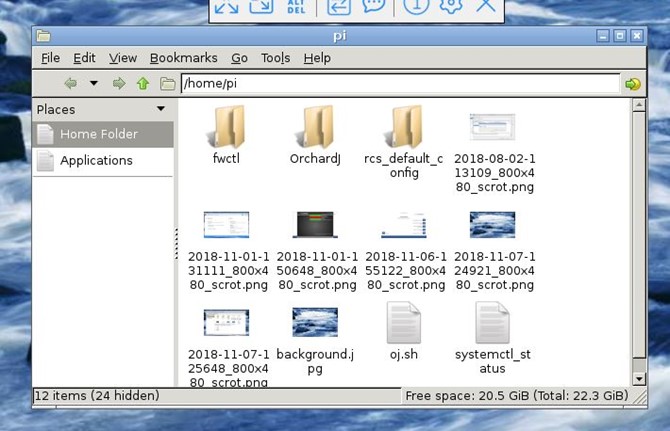
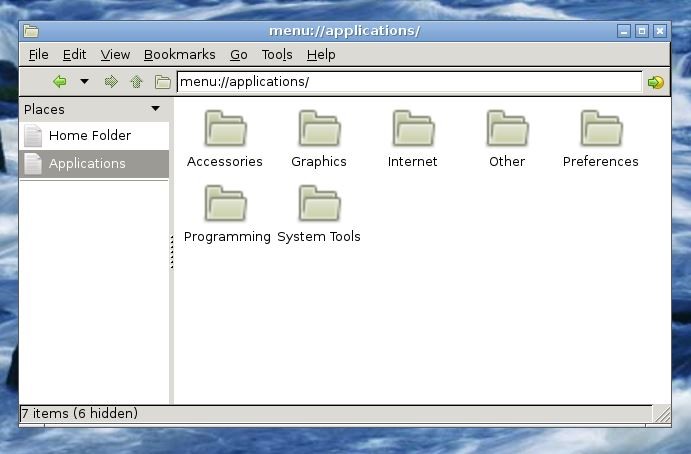
CDS-9L/CDS-820j — File manager
The file manager has two sub folders:
The standard user folder is /home/pi. By default, Connect on-Device is installed in this folder.
Note
To access the USB stick, go to /media/usb0.
For more information on the Connect on-Device folder structure, see Connect on-Device installation folder and folder structure.
From the Applications sub folder, you browse and activate installed applications.
Configuring CDS-9L/CDS-820j using Connect on-Device Studio
You use this procedure to configure CDS-9L/CDS-820j from Connect on-Device Studio.
Add a folder on an empty USB stick.
Name the folder
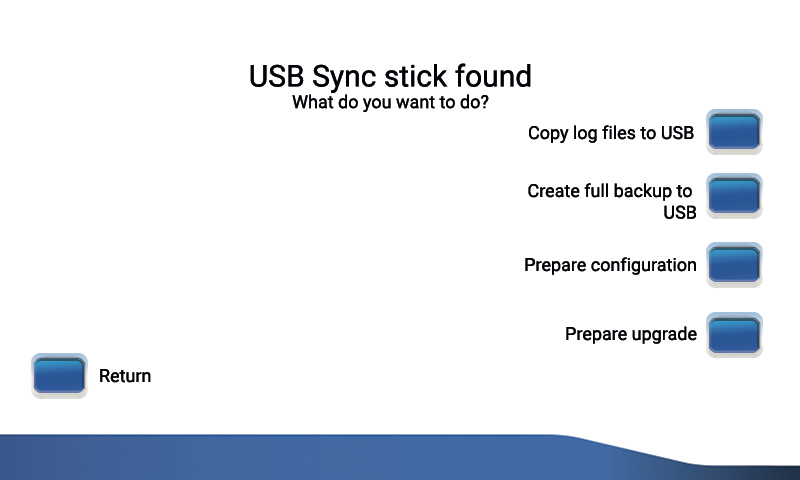
ojsync.Open up the top cover of your CDS-9L/CDS-820j top cover and connect the USB stick.
The following options are displayed:
Copy log files to USB
Create full backup to USB
Prepare configuration
Prepare upgrade
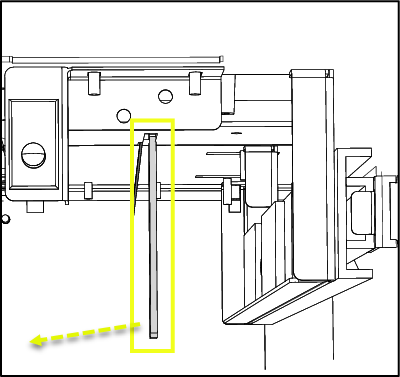
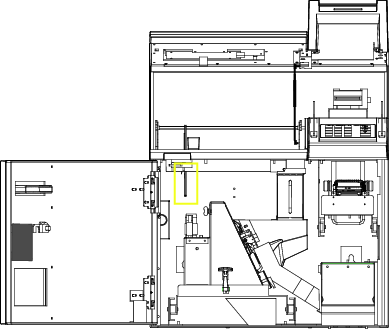
This is where you connect the USB stick on a CDS-820j:
Select, Prepare upgrade and wait until the process is completed.
Remove the USB stick.
Connect the USB stick to a computer.
Start Connect on-Device Studio on the USB stick,
ojsync\config\tools\configurator\startOJConfigurator.bat.Do the configurations and save them.
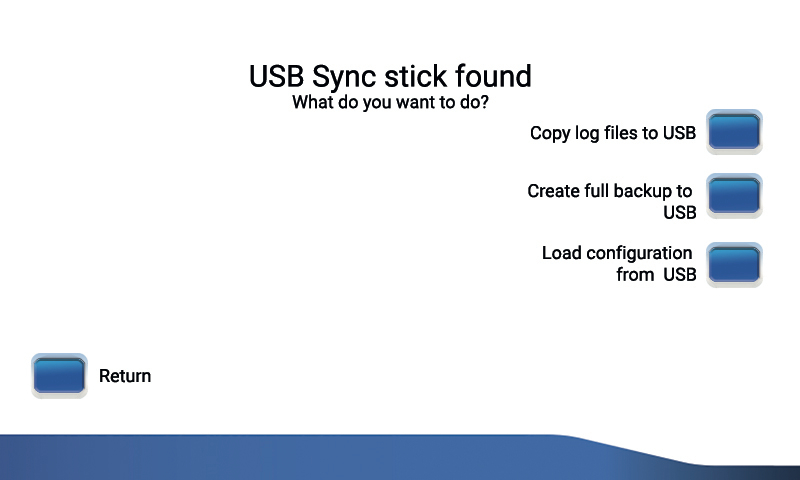
Connect the USB stick to the CDS-9L/CDS-820j. The following options are displayed:
Copy log files to USB
Create full backup to USB
Load configuration from USB
Select Load configuration from USB.
When the update is completed, press Enter.
See also
Configuring CDS-820j/CDS-9L using CDS820jSetup.exe
You use this procedure to configure CDS-820j/CDS-9L.
Download the
CDS820jSetup.exefile from here.Run the
CDS820jSetup.exefile.Insert a USB stick.
Select Prepare memory stick. This process deletes all the contents on the USB stick. An empty folder called
ojsyncis created on the USB stick.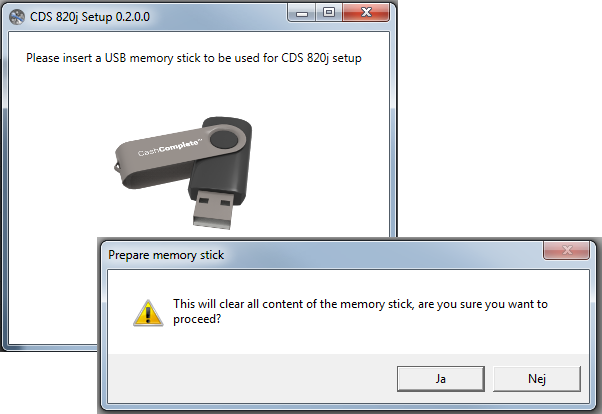
Remove the USB stick.
Open up the CDS-9L/CDS-820j top cover and connect the USB stick. The following options are displayed:
Copy log files to USB
Create full backup to USB
Prepare configuration
Prepare upgrade
This is where you connect the USB stick on a CDS-820j:
Select Prepare configuration and wait until the process is completed.
Remove the USB stick.
Connect the USB stick to a computer.
Run the
CDS820jSetup.exefile.Insert the USB stick when requested. Connect on-Device Studio starts.
Do the configurations and save them to the USB stick.
Connect the USB stick to the CDS-9L/CDS-820j. The following options are displayed:
Copy log files to USB
Create full backup to USB
Load configuration from USB
Select Load configuration from USB.
Press Enter when the update is completed.
See also
Configuring CDS-9L/CDS-820j using an SD card
You use this procedure to configure CDS-9L/CDS-820j using an SD card.
Important
Before starting this procedure, you must install a tool that allows writing raw disk images to FLASH memory cards, such as Rufus (available from here).
Download the image file from CDS image files.
Insert an empty SD card in your computer.
Run the tool.
Select the image file.
Run the procedure to write the disk image to the SD card..
Click OK and remove the SD card.
See also
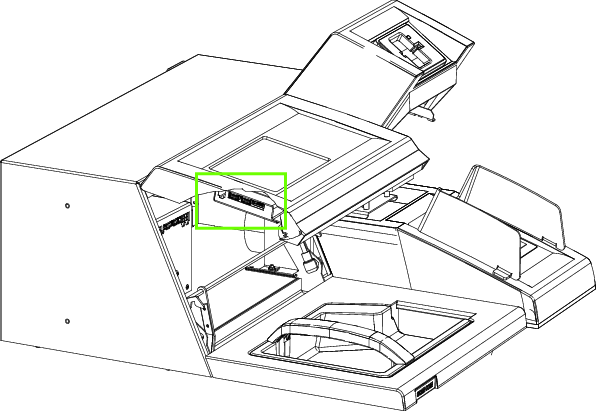
Replacing the CDS-820j/CDS-9L micro SD card
You use this procedure to replace the micro SD card.
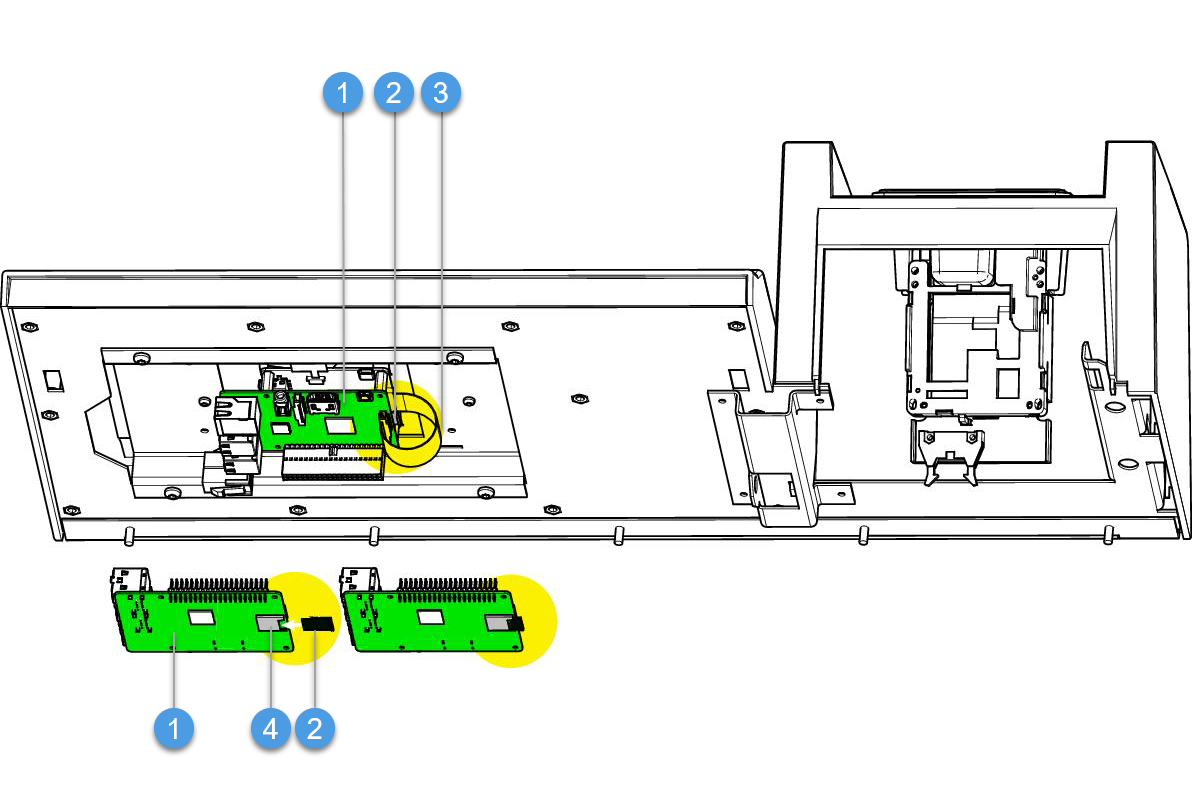
CDS-820j: 1. Main board 2. Micro SD card 3. Flat cable 4. SD card holder
Open the top cabinet.
This is what it looks like on a CDS-820j:
Latch
Remove the cover.
Remove the flat cable.
Pull out the SD card in a straight motion. outwards.
Insert the new SD card in a straight motion.
Connect the flat cable.
Put the cover back.
Close the top cabinet.
See also
Setting up CDS-820j/CDS-9L with ID last
You set up CDS-820j/CDS-9L with ID last to make it possible to make a deposit without an account.
Note
On Windows: Set up a new role with the name Default.
On Linux: Use the Default role.
For the ID check to be done after the deposit, set the following permissions to the Default role:
DEPOSIT DEPOSIT_ID_LAST
If a text indicating that the receipt is a voucher is required on the receipt, add the DEPOSIT_RECEIPT_TITLE permission.
Start Connect on-Device Studio.
In the navigation pane, select Identify.
In the Authentication methods field, select Door and Anonymous.
In the ID Last field, select Card and/or User id.
Click Save to save the settings.
Tip
Click Undo to discard unsaved changes.
See also